When Were Bikes Invented? The Fascinating History of the Bicycle & Who Made it Possible

Ever looked at a bicycle and thought, “Who came up with this genius two-wheeled machine?” Spoiler: it wasn’t someone with a carbon fibre frame and padded shorts. In fact, the humble bike has a surprisingly quirky backstory – one filled with wooden wheels, wobbly inventions, and some absolutely terrifying designs (we’re looking at you, penny farthing).
So, when were bikes invented? And how did we go from foot-powered contraptions to high-speed, gear-packed road rockets? Let’s take a spin through history and find out.


The Birth of the Bicycle: 1817

When were bikes invented? Most historians point to 1817, when a German inventor named Baron Karl von Drais unveiled the world’s first two-wheeled, steerable contraption. Known as the “Draisine” or “running machine,” it didn’t have pedals. Instead, riders would straddle the wooden frame and push themselves along using their feet – sort of like Fred Flintstone but in fancy trousers.
This early bike-like invention was the seed that grew into cycling as we know it. Von Drais called it the “Laufmaschine” or “running machine,” but we think “balance bike for grown-ups” would have done the trick.

Pedals Enter the Scene: The Boneshaker Era

By the 1860s, innovation took another big leap. The French decided walking while riding wasn’t quite their thing. Consequently, the Velocipede, the first pedal-powered bike, entered the scene. Pierre Michaux and his son Ernest Michaux added cranks and pedals directly onto the front wheel of the wooden frame, giving birth to the first true bicycle.

The ride? Bumpy. Very bumpy. Made of wood and iron with zero suspension, it was fondly nicknamed the “boneshaker.” You felt every cobblestone, every crack, and probably re-evaluated all your life choices halfway down the street. But it paved the way (literally) for the bikes we know today.

The Penny Farthing: Equal Parts Stylish and Terrifying

penny farthing
In 1869, French mechanic Eugene Meyer (now recognised as the “father of the high bicycle”) introduced a bicycle with a big front wheel and a smaller back wheel. The goal? More speed. The idea was: the bigger the wheel, the further you travelled with each pedal stroke.
Stylish for the time, definitely, but mounting one was practically a circus act. And stopping? Let’s just say falling face-first was a common feature. The classic name Penny Farthing came from British engineer James Starley. The two wheels’ resemblance to a penny and a farthing coin – large and small, just like the design.
Despite the drama, it was the first machine to be actually called a “bicycle,” and it became a symbol of daring gentlemen everywhere.

The “Safety” Revolution: A Bike for Everyone

early safety bike

By the 1880s, people began to realise that maybe falling from six feet in the air wasn’t that much fun nor convenient. This led us to the Safety Bicycle, invented by John Kemp Starley (James Starley’s nephew by the way – bike genius clearly ran in the family). His design was a total game-changer.
This new bike had equal-sized wheels, a rear-wheel chain drive, and a much lower centre of gravity. It was easier to ride, safer, and more accessible to the masses. For the first time, the bicycle became a practical, everyday mode of transport – and it caught on fast.

Transforming Society: Women’s Fight for Independence

liberation for women using the bicycle
But here is another interesting fact: bicycles weren’t just invented to change transport. It helped change society, especially for women.
In the late 19th century, women were beginning to push harder against societal norms, and the bicycle gave them something they hadn’t really had before: mobility and independence. It allowed them to travel without a chaperone, leave the house freely, and go where they wanted, when they wanted – all radical ideas at the time.
Suffragette Susan B. Anthony famously said, “I think [the bicycle] has done more to emancipate women than anything else in the world.” And she wasn’t wrong. Riding a bike also influenced women’s fashion. Out went restrictive corsets and long skirts, in came bloomers and practical clothing, making way (literally) for movement and self-expression.
The bicycle became a quiet but powerful symbol of liberation. It showed the world that women weren’t just passengers. They were fully capable of steering their own path. On two wheels, they found freedom, autonomy, and a bit of wind in their hair.

20th Century Gears Up: Racing, War & Pop Culture

when were bmx bikes invented
As we rolled into the 1900s, things got more serious. Bikes got gears (thanks to French innovator Paul de Vivie, aka “Vélocio”), inflatable tyres (shoutout to John Boyd Dunlop, who developed pneumatic tyres in 1888), and metal frames that could withstand real mileage.
The bicycle became a tool of both peace and war. Soldiers used them during WWI and WWII for transport, while messengers moved between posts. In 1903, the first Tour de France launched, turning bikes into symbols of speed, endurance, and glory (not to mention calf envy).
From BMX booms in the 1980s to the hipster-fuelled single-speed renaissance, the 20th century cemented cycling as both sport and lifestyle.

Modern Bikes: Techy, Trendy, and Electric

modern electric bike - who invented the bike

Nowadays, bicycles are marvels of engineering. We’ve got carbon fibre that weighs less than your lunch, electric motors that let you cruise uphill, and hydraulic disc brakes that stop you on a dime (not a farthing).
From mountain bikes to gravel bikes, folding commuters to e-bikes, there’s a ride for every style, need, and budget. The rise in cycling infrastructure and awareness has only made it easier and more rewarding to ride.
And if you’re still wondering “when were bikes invented?”, just take a look at today’s bikes – they’re the result of over 200 years of wild ideas, epic crashes, and relentless tinkering.

Where to Buy a Bike or Get It Upgraded – Support Local, Ride Happy

If you’re in Whitechapel, London, pop by TEAMMC Cycles. We service and upgrade bikes of all shapes and sizes (although a Penny Farthing would be a first). We also fix up and resell affordable, reliable bikes, perfect for new riders, seasoned commuters, or anyone looking to reconnect with two-wheeled freedom.
And the best part? All profits support our partner charity, helping underrepresented communities through training, mentoring, and empowerment. So when you ride away with one of our bikes or a freshly serviced one, you’re pedalling with purpose.

Conclusion

So, when were bikes invented? Back in 1817 – with no pedals and plenty of splinters. From there, brilliant inventors like Von Drais, Michaux, Meyer, Starley, and others helped push the concept forward, eventually creating the fast, safe, and stylish rides we have today.
And guess what? The story of the bicycle isn’t over. Whether you’re into vintage rides or e-bikes, racing or leisure cruising – there’s always a new adventure waiting just down the road.

🚴‍♂️ Happy Cycling! 🚴‍♀️

How to Prevent Bike Theft: A Rider’s Guide to Keeping Your Bike Safe

Bike theft. 2 words that every cyclist dreads. It is the frustration, the anger and the feeling of loss of your loyal companion that makes this the worst experience for many fellow riders. Whether you ride a sleek carbon road bike, a comfy hybrid, or your pride-and-joy custom build, losing it to theft can be both financially painful and emotionally gutting.

Why Bike Theft Is Still So Common

It’s said that over 70,000 bikes are stolen each year in the UK alone, and that’s just what people reported. Cities like London, Manchester, and Birmingham are among the hardest-hit areas, though bikes can get stolen everywhere.

Thieves often scout busy commuter hubs, public bike racks near shops or gyms, and even quiet residential streets where we would assume our bikes are safe.

Many thefts happen in under 60 seconds. All it takes is a poor-quality lock, an exposed component, or a moment of complacency – and the bike is gone. Worse still, most stolen bikes are never recovered, especially if they’re not registered or properly secured.

So, how to prevent bike theft? It’s about layers of security, smart habits, and just making your bike more effort than it’s worth to steal. So here are a few bike theft prevention tips for you:

1. Get the Right Lock (and Use It Properly)

Your lock is your first line of defence – so make it count.

Quality matters. The best bike lock you can buy is one that’s rated by Sold Secure, a third-party testing group. Aim for Gold or Diamond-rated locks. These locks are tested against real-world attack methods like bolt cutters, hammers, drills etc. Silver is acceptable for lower-risk areas, but Gold is your go-to if you’re serious about security.

A sturdy D-lock (also called a U-lock) is the gold standard. Look for one with a thick, hardened steel shackle. To step things up, pair your D-lock with a secondary lock, like a chain or cable. This not only secures your wheels, but it also means a thief needs two different tools to get through. Thieves don’t like carrying too much kit. So the more time and effort it takes to steal your bike, the less likely they’ll even try.

How to lock your bike properly:

  1.   Lock the frame and rear wheel to a solid, immovable object like cycle stands.
  2.   Use a secondary lock for the front wheel.
  3.   Keep the locks tight and elevated off the ground. (It’ll be harder to leverage tools.)
  4.   Position the lock mechanism facing downward to make it harder to tamper with.

In short: lock your bike properly, and make it a nightmare to steal.

2. Where You Park Matters

Even the strongest lock can’t help if you’re parking somewhere sketchy. Knowing how to secure a bike includes choosing the right spot to leave it.

Here’s what to look for:

  • High visibility: Park in well-lit, high-footfall areas. Thieves don’t like an audience.
  • Solid infrastructure: Lock your bike to a sturdy bike rack or metal post that’s concreted into the ground. Removable signposts or thin fences are useless. Test it. If it wiggles, don’t risk it.
  • Avoid patterns: Don’t leave your bike in the same spot every day. It makes it easier for thieves to plan.

3. Secure Your Components – Especially the Wheels & Saddle

Quick-release parts are convenient for you, but also for the thief, and a massive target. Wheels, saddles, even handlebars can be gone in seconds. So how do you stop that?

Proudly presenting: Anti-theft skewers – one of the smartest upgrades you can make. (Personally: big fan!)

Instead of traditional quick-release levers or Allen bolts, these use special locking mechanisms that require a unique key to remove. Some even use your own body weight to unlock when the bike is flipped upside-down (clever, right?). Once installed, not only your wheels and saddle are safe from opportunistic thieves who only carry basic tools, but your entire bike becomes worthless to them.

If you’ve ever wondered how to make your bike less attractive to thieves, this can be a way forward.

4. Use GPS Trackers & Smart Tech

Thieves might be quick, but tech can be quicker.

Tiny, discreet GPS trackers (like Apple AirTags or specific cycling-focused trackers) can be hidden in your bike’s frame, seat post, or even inside a handlebar plug. Some even track live movement and send alerts to your phone when the bike moves unexpectedly.

Here’s how they help:

  • Real-time tracking: You know exactly where your bike is.
  • Movement alerts: Some trackers will buzz your phone if your bike is tampered with.
  • Recovery assistance: Share your tracker’s location with police for retrieval.

5. Consider a Bike Alarm

Sometimes all you need is a little noise. Or a lot. Unpleasant, alarming, getting everyone’s attention.

Bike alarms are compact, motion-sensitive devices that blare out a loud alert if someone starts messing with your bike. Some even pair with your phone for instant notifications.

They’re not a replacement for a good lock – but they’re a great deterrent, especially in public or semi-monitored spaces like apartment blocks or office racks. Remember: Thieves hate an audience.

Think of it as your bike shouting, “OI! Leave me alone!”

6. Don’t Get Complacent at Home

We get it: when your bike is at home, it feels safe. But garages and sheds are prime targets. Many thefts happen without forced entry, especially if security is lax. Opportunity makes the thief.

Here’s how to beef up your home defences:

  1.   Use your main lock inside the garage or shed, locking your bike to something solid.
  2.   Install a ground anchor if you have a concrete floor.
  3.   Add a motion-sensitive light or small security camera.
  4.   Lock doors and windows, especially overnight.
  5.   Consider a bike alarm indoors as well.

You’ve got indoor storage space? Awesome! Bring your bike inside when you can – hallway hooks, wall racks, or free-standing stands work great and add a bit of “cycling chic” to your décor.

7. Register Your Bike – Seriously, Do It

If your bike does get taken, having proof it’s yours makes a world of difference. Registering your bike is free, easy, and might even help you get it back.

Here’s what to do (*making a mental note*):

  1. Find your frame number – usually located on the bottom bracket, near the cranks.
  2. Register it with a service like BikeRegister or Immobilise.
  3. Take clear photos of your bike – side-on, close-up of the frame number, and any unique features or upgrades.
  4. Save receipts or order confirmations for major components or full builds.

Many police departments check bike registration databases when they recover stolen property. If your bike is in there, you’ve got a much better chance at getting it back.

8. Don’t Forget Insurance

You don’t ride to think about worst-case scenarios, but knowing you’re covered if something goes wrong can be a huge relief.

Many home insurance policies include bike cover, but check the fine print: Are you covered outside the house? Do you need to list the bike separately if it’s high value? Are accessories like GPS units, lights, saddlebags etc. covered too?

There are also specialist bike insurance providers who offer tailored policies for theft, race damage, travel loss and more. If your bike is worth more than a holiday, it’s worth protecting it like one.

What to Do When Your Bike Got Stolen?

Even with all the right precautions, bad luck happens. If your bike is stolen:

  1. Report it to the police and get a crime reference number.
  2. Check local listings (Gumtree, Facebook, eBay) for your bike or parts.
  3. Alert local cycling groups and online forums.
  4. Share your bike’s details, photos, and frame number widely.
  5. Notify your insurer and tracker provider (if applicable).

Act fast: most stolen bikes are sold or stripped within 48 hours.

Final Bike Theft Prevention Tips

Let’s wrap it up with a few quick wins:

  • Invest in a high-quality, Sold Secure Gold lock
  • Always lock through frame and wheels
  • Park your bike where it’s visible
  • Use anti-theft skewers
  • Register your bike and keep your docs
  • Embrace tech: alarms, GPS trackers, smart locks
  • Don’t forget at-home security
  • Insure your bike for peace of mind

Want Help Locking It Down?

TEAMMC Cycles offers high-quality bike locks, anti-theft skewers, other accessories and upgrade services, so you can ride with peace of mind. Whether you’re commuting daily or gearing up for your next big ride, we’ve got the kit, the know-how, and the backup to keep your bike exactly where it belongs: with you.

Drop us a line or swing by for any help you might need – your bike deserves nothing less.

Are Carbon Frames Stronger Than Aluminium? Exploring the Differences in Bike Frames

When it comes to choosing the right bike, one of the most common questions cyclists ask is, “Are carbon frames stronger than aluminium?” The material of a bike frame can influence its weight, durability, performance, and overall ride experience. Generally, what works for cyclists will depend on their circumstances. Both carbon and aluminium have disparate factors that make them suitable for different types of riding styles. In this blog, we’ll explore whether carbon frames are indeed stronger than aluminium, compare their pros and cons, and help you decide which material is right for you.

Are Carbon Frames Stronger Than Aluminium?

Understanding Strength: What Does It Mean for Bike Frames?

To answer the question of whether carbon frames are stronger than aluminium, we need to first define what strength means in the context of a bike frame. Strength refers to how well the frame can resist various forces such as tensile stress, impact, and bending.

  • Tensile Strength: This is the maximum amount of stress a material can withstand before it starts to stretch or break.
  • Impact Resistance: This is the material’s ability to withstand sudden forces, such as hitting a bump or taking a fall.
  • Stiffness: A material’s ability to resist bending or flexing, which plays a crucial role in transferring energy from the rider to the wheels.

While strength is important, it isn’t the only factor to be considered when choosing a bike frame. Weight, flexibility, cost, and overall durability, should also play a significant role in the decision.

Carbon Frames: Pros and Cons

what is the difference in bike frames

The question remains, are carbon frames stronger than aluminium? Well, let’s look at the pros and cons.

Advantages of Carbon Frames:

  • Lightweight: Carbon fiber is incredibly strong for its weight, making it the go-to choice for performance cyclists looking to minimize weight. A lighter frame can help you climb faster, and accelerate more efficiently.
  • Stiffness: Carbon frames can be engineered for higher stiffness, which is ideal for high-performance riding. Stiffness allows for better energy transfer, meaning that more pedalling power goes directly into propelling the bike forward.
  • Customization: Carbon frames can be molded into complex shapes, giving manufacturers the ability to fine-tune the ride characteristics. Riders can get a smoother, more responsive ride tailored to their preferences. The carbon fibre lay-up can also be manipulated to enhance ride characteristics like comfort and power transfer to just name a few.

Disadvantages of Carbon Frames:

  • Fragility Under Impact: While carbon is strong, it can be more prone to cracking under a sudden impact, such as a fall or a hard hit during travel. So, are carbon frames stronger than aluminium when it comes to impact resistance? Not necessarily. Carbon tends to crack under severe impact, whereas aluminium will dent, but is generally more resilient.
  • Cost: Carbon frames can be significantly more expensive than aluminium. Whether the cost is justified is down to the individual riders circumstances and what sort of riding they do.

Aluminium Frames: Pros and Cons

does a carbon frame make me faster

Now let’s look at aluminium frames.

Advantages of Aluminium Frames:

  • Durability: Aluminium is known for its resilience to dings, and dents. If you’re an avid cyclist who rides frequently or tackles rougher terrain, you’ll appreciate aluminium’s toughness. It’s more likely to withstand a fall without cracking.
  • Cost-Effectiveness: Aluminium is much cheaper than carbon, which makes it a popular choice for recreational cyclists or those on a budget.
  • Reliability: Aluminium is a great option for beginner cyclists or those who ride casually. It’s a dependable choice for daily commuting and weekend rides.

Disadvantages of Aluminium Frames:

  • Heavier Than Carbon: Aluminium frames are heavier than carbon frames, which can be a downside for performance cyclists who want to minimize weight.
  • Less Stiff Than Carbon: Broadly, aluminium is not as stiff as carbon. This means it may not provide the same level of energy transfer, which could be important for serious cyclists.

Key Comparisons: Carbon vs Aluminium

carbon frame vs aluminium frame

Now that we’ve examined the individual advantages and disadvantages of carbon and aluminium frames, let’s compare the two in terms of key performance factors.

Strength:

Are carbon frames stronger than aluminium when it comes to tensile strength? Carbon is stronger in terms of tensile strength, being able to withstand more force before stretching/bending. However, in terms of impact resistance, aluminium tends to be more durable, especially under sudden impacts. While carbon can crack under a hard hit, aluminium will usually remain intact.

Weight:

Carbon wins when it comes to weight. It is significantly lighter than aluminium, which is why carbon frames are preferred by competitive cyclists looking to shave off every ounce for performance gains.

Durability:

Aluminium has the edge when it comes to durability. It is more resistant to dents and dings compared to carbon.

Cost:

Aluminium is much cheaper than carbon. But, carbon’s higher price reflects its superior performance and lightweight properties, possibly making it worth the investment for enthusiastic cyclists.

Use Case Suitability:

  • Carbon: Best for serious cyclists, racers, or anyone looking for a high-performance, lightweight frame.
  • Aluminium: Ideal for recreational cyclists, commuters, or beginners who need a reliable, durable, and cost-effective bike frame.

Busting Myths About Carbon and Aluminium Frames

busting myths about bike frames

There are plenty of myths surrounding carbon and aluminium bike frames. Let’s address a couple of them:

  • “Carbon always breaks easily”: This is not true. While carbon can crack under severe impacts, it’s actually very strong and durable for regular cycling conditions. It’s just important to handle it with care.
  • “Aluminium is too heavy for serious cycling”: Aluminium is heavier than carbon, but it’s still a perfectly viable option for competitive cyclists, especially those who don’t want to spend a lot of money on a carbon frame.

What’s the Conclusion?

conclusion carbon frame fast than aluminium frame

So, are carbon frames stronger than aluminium? The answer depends on how you define strength. In terms of tensile strength, carbon has the upper hand. However, when it comes to impact resistance, aluminium may be the better choice for cyclists who need durability and resilience. Ultimately, both materials offer their own unique benefits, and the right bike frame for you will depend on your riding style, performance goals, and budget.

Remember, strength is just one factor in your decision. Weight, durability, cost, and your intended use are all important considerations. By weighing these factors, you can choose the best frame for your needs and enjoy a ride that’s tailored to you.

At TEAMMC Cycles, we’re here to help. Whether you’re looking to service your bike, upgrade or build your bike from the ground up, carbon frame or not, our expert team can guide you every step of the way. Visit us at our shop & cycle cafe in Whitechapel, East London, and let’s chat about how we can help you over a relaxing coffee. See you soon.

🚴‍♂️ Happy Cycling! 🚴‍♀️

​Richmond Park Cycle Routes: Deer, Gears, and Glorious Views

Richmond Park, located in the southwest of London, spans 2,500 acres and is the largest Royal Park in the capital. Its road and mountain bike routes offer both seasoned and beginner cyclists a diverse terrain for an enjoyable day out. In this guide, we’ll explore the different Richmond Park cycle routes, challenges, and tips for making the most of your ride around the park.


A Brief History of Cycling in Richmond Park

Charles I established Richmond Park as a deer park and hunting ground in 1625. Just 12 years later the park was opened to the public (with restrictions) and has evolved into a haven for both wildlife and recreation over the last centuries. Cycling has been an integral part of the park’s culture, with bike enthusiasts flocking to the different Richmond Park cycle routes to enjoy the natural surroundings and riding challenges.

richmond park cycling routes

Natural Bliss

Richmond Park has a wild character to its surroundings. From wild woods to grassland, laid out gardens and ponds, it has a lot to offer. The park is home to around 600 deer, grazing on its grounds. Depending on the time of day they have their favourite spots. If you’re lucky you’ll spot a few. Saying that, be careful on the road or on the trail. Deer might cross without looking left and right and giving you right of way. That’s why it’s not recommended to cycle in the park after dark, just for safety reasons.
The park has a lot to offer. It changes completely throughout the seasons. So, make sure you try Richmond Park’s cycle routes at various times of the year to get a different riding experience each time.

Where to Get into the Park: Gates of Richmond Park

richmond park access

So how do you get to the park? Hmm… By bike?

There are several gates that serve as access points to the various Richmond Park cycle routes:

  • Richmond Gate: Located in the northwest, offering direct access from Richmond town.​
  • Sheen Gate: Situated to the north, connecting you to East Sheen.
  • Roehampton Gate: Found on the northeastern side near Roehampton, super popular among cyclists for the cycle-friendly Roehampton café inside the park.
  • Robin Hood Gate: Located in the southeast, near the A3 road.​
  • Kingston Gate: On the southern tip of the park, providing access from Kingston.​
  • Ham Gate: On the southwest side of the park, connecting Ham.
  • Petersham Gate: A pedestrian-only gate near Petersham.​

As a cyclist you can start your ride at any of the gates, depending on the route you want to take, and which challenges you want to tackle first.

Park Opening Hours

Speaking of gates: the park is open most of the times throughout the year. The vehicle gates open at dawn and close at dusk – they do have different opening and closing times in Summer and Winter, so check the Park’s official website. The pedestrian gates (which your bike will fit through, unless it’s a cargo bike) are open 24/7, except during cull seasons in November and February for 6 weeks when they are locked from 8:00pm to 7:30am.

Cycling Routes: On the Road

richmond park cycle route on-road

The main loop is a well-loved circuit among road cyclists of roughly 6.7 miles (10.8 km) and the backbone of Richmond Park’s cycle routes. It’s a tarmac route that provides a balanced mix of open straights for speedwork and a few steady inclines to keep things interesting. Perfect whether you’re in training mode or out for a weekend spin.
Riders can choose to cycle in either direction: clockwise or counter-clockwise. Each route has its quirks. Going clockwise, entering at the Roehampton Gate, you’ll hit the long drag up Sawyers Hill early, testing your legs within the first mile. But switch things up and head counter-clockwise, and you’ll face the sharper climb up Broomfield Hill, which some say is the park’s cheekiest ascent. There’s no wrong choice really. It just depends on whether you want a slow burn or a short punch in your ride. Either way, you’ll have fun descending those hills!
The surface is generally smooth and well-maintained, with clearly marked lanes and fellow cyclists often out in droves (especially on weekends). It’s also a popular Strava segment, so if you’re the competitive type, you might find yourself pushing for a personal best without even meaning to. The current record of the main loop is 13mins 35 seconds by professional cyclist David Millar. An average person would likely take around 30mins. Show-off.
There are a couple of scenic cut-through routes near Pen Ponds Café, one leading west toward Ham Gate, and another heading north past the Royal Ballet School. Perfect if you’re looking to switch things up or fancy a shorter loop with a change of scenery.

Cycling Routes: Off-road

richmond park cycle route off-road

For those who prefer knobbly tyres and a bit of grit, Tamsin Trail is the go-to Richmond Park cycle route. This 7.35-mile (11.8 km) off-road loop hugs the park’s perimeter, offering a more natural, rugged cycling experience.
The trail itself is a mix of gravel, dirt paths, and occasional loose stone, winding through ancient woodlands, grassy clearings, and open heath. It’s ideal for mountain bikes, hybrids, or gravel bikes – essentially anything that can handle a few bumps and the occasional muddy patch (especially after rain). While the route isn’t technical in a trail-centre kind of way, it keeps you on your toes with gentle twists, short climbs, and uneven surfaces that reward focus and control.
One of the best things about the Tamsin Trail is how close it brings you to the natural beauty of the park. You’ll pass herds of deer and ride beneath old oaks. It’s also a quieter ride, away from the busier roads – ideal for anyone who wants a bit of peace with their pedalling.
Whether you’re using it as a cross-training route, introducing a friend to mountain biking, or just getting in some soul-cleansing miles in nature, the Tamsin Trail is a gem. Just don’t forget to yield to walkers and dogs – it’s a shared-use path, after all.

Challenges: Hill Training

cycle training

Richmond Park isn’t just a picturesque loop – it’s a playground for cyclists looking to push themselves. Its layout and terrain are ideal for building strength, stamina, and climbing legs, with a handful of notable hills that demand respect (and maybe a couple of gears down).

  • Broomfield Hill: Arguably the park’s most notorious climb. It’s short, sharp, and a real lung-burner. Starting near Robin Hood Gate going clockwise, it creeps up before suddenly punching you with a steep incline that forces you to dig deep. Perfect for hill repeats or testing your lactate threshold if you’re feeling brave.
  • Dark Hill: Don’t let the poetic name fool you, this one is a little brute. Found near the Kingston Gate going counter-clockwise, it’s a winding, tree-covered climb with a gradient that spikes suddenly, giving you just enough time to question your life choices before it evens out. Great for short, intense efforts.
  • Sawyers Hill: Often underestimated, this climb feels more like a long drag than a steep wall (coming from Roehampton Gate, going counter-clockwise). But after a few loops, you’ll definitely feel it in your legs. It’s an ideal climb for sustained power efforts and interval work – plus the views across the park are a great excuse to stop (or pretend to check your gears).

Together, these climbs make the Richmond Park cycle routes an excellent training ground whether you’re prepping for a sportive, building your climbing endurance, or just looking to earn your post-ride coffee. Mix them into a loop or hit them back-to-back for your own DIY hill session.

Other Types of Training

do you need supplements

On top of hill training, there are other ways you can get your gear in full swing.

  • Interval Training: The mix of hills and flat stretches make Richmond Park perfect for structured intervals. Attack a climb at full effort, then use the next flatter section to recover. Rinse and repeat. This method is brilliant for improving cardiovascular fitness, strength, and recovery time – all while soaking up the park’s glorious scenery.
  • Time Trials: The 6.7-mile (10.8 km) main loop is a dream for those chasing personal bests. Many riders use it for time trials – setting the stopwatch at the start of a lap and pushing for consistent improvements with each loop. It’s a great way to monitor progress, improve pacing, and add a bit of healthy competition (even if it’s just against yourself or your last Strava upload).
  • Endurance Rides: Need to build up mileage? Richmond Park’s main loop is ideal for endurance sessions. String together multiple laps to rack up the distance while staying close to amenities and exit points. It’s a safer and more engaging alternative to monotonous turbo trainer sessions – and there’s always the chance of a deer crossing to keep things interesting.

With a bit of planning, you can turn Richmond Park into your personal outdoor training lab – just don’t forget to nod at fellow riders. It’s practically the local rule of the road.

Are you ready for a ride in Richmond Park? Its cycle routes offer a harmonious blend of historical significance, natural beauty, and diverse cycling challenges. Whether you’re seeking a leisurely ride amidst serene landscapes or an intense training session tackling steep hills, Richmond Park provides an experience that caters to all cycling enthusiasts. 

TEAMMC Cycles organises rides during the week, and sometimes in Richmond Park. If you want to ride out with a friendly bunch of cycling enthusiasts, get in touch with us. We’ll be happy to hear from you.

🚴‍♂️ Happy Cycling! 🚴‍♀️

The Power of Wheels: Which Wheels Make You Faster?

If you’ve been cycling for a while, you’ve probably heard people say, “Wheels make the biggest difference.” But is that really true? Can swapping your wheels actually make you faster on the bike? And if so, what type of wheels should you choose to maximise your speed and efficiency?

In this blog, we’ll take a deep dive into the world of bike wheels, explaining how they affect performance, which types of wheels are best for different kinds of riding, and how to pick the right set to give you that extra edge. Whether you’re a road racer, commuter, or weekend warrior, understanding the power of wheels can transform your cycling experience.

How Do Wheels Affect Your Speed?

Wheels are one of the most critical components of your bike when it comes to speed and efficiency. Here are the key factors that determine how wheels influence your performance:

The Power of Wheels

  1. Weight: Lighter wheels make it easier to accelerate and climb. Less weight means less effort is needed to bring the wheels up to speed.
  2. Aerodynamics: The shape of your wheels affects how smoothly they cut through the air. More aerodynamic wheels reduce drag and help you maintain higher speeds with less effort.
  3. Rim depth: The depth of your wheel rims impacts both weight and aerodynamics. Deeper rims can be more aerodynamic but may also be heavier and harder to control in windy conditions.
  4. Rolling resistance: This is the friction between your tyres and the road. High-quality wheels often allow for tyres with lower rolling resistance, meaning you lose less energy as you ride. 
  5. Rim width: As more riders switch to wider tires, a wider rim helps by cutting down on aerodynamic drag, providing a smooth transition from rim to tyre and keeps the tyre from ballooning too much. But if the tyre is too narrow for the width of rim being used, it won’t fit properly since the bead won’t be wide enough to hook onto the rim securely.
  6. Stiffness: Stiff wheels transfer power from your pedals to the road more efficiently. This helps you get the most out of each pedal stroke, especially during sprints or climbs.

Types of Wheels and Their Impact on Speed

types of wheels

1. Shallow Rim Wheels (25-35mm Depth)

Best For: Climbing, all-round riding, and windy conditions.

  • Pros: These wheels are typically lighter, making them great for climbing and accelerating. They’re also easier to handle in crosswinds.
  • Cons: They lack the aerodynamic benefits of deeper wheels, so they’re not ideal for sustained high speeds on flat terrain.

Conclusion: If you ride in mixed terrain or love tackling hills, shallow rim wheels are a solid choice. They’re versatile, light, and easy to manage.

2. Mid-Depth Rim Wheels (35-50mm Depth)

Best For: All-round performance, road racing, and time trials.

  • Pros: These wheels strike a balance between weight and aerodynamics. They’re fast on flats and still light enough to handle climbs effectively.
  • Cons: They can be slightly trickier to control in windy conditions compared to shallow rims.

Conclusion: Mid-depth wheels are a popular choice for road racers and enthusiasts who want a versatile option that performs well across a variety of conditions.

3. Deep Rim Wheels (50-80mm Depth)

Best For: Time trials, triathlons, and high-speed flat rides.

  • Pros: Deep rims are extremely aerodynamic, making them perfect for maintaining high speeds on flat terrain. They excel in time trials and triathlons where every second counts.
  • Cons: They’re heavier and can be difficult to control in strong crosswinds. They’re also less efficient when climbing steep hills.

Conclusion: If your goal is pure speed on flat or rolling terrain, deep rim wheels are the way to go. Just be prepared to handle them carefully on windy days.

4. Disc Wheels

Best For: Time trials and triathlons.

  • Pros: Disc wheels offer the best possible aerodynamics because they have no spokes to create drag. They’re incredibly fast in straight-line situations.
  • Cons: They’re heavy and can be challenging to manage in crosswinds. They’re also typically not allowed in regular road races for safety reasons.

Conclusion: Disc wheels are a specialist choice. If you’re racing against the clock, they’re worth considering.

Alloy vs Carbon Wheels

carbon wheels

Another major decision is choosing between alloy and carbon wheels. Alloy wheels are typically more affordable, durable, and easier to repair. They’re great for everyday riding, commuting, and training.
Carbon wheels, on the other hand, are wheels that are usually lighter and often more aerodynamic, offering better performance overall. However, they’re more expensive and can be more prone to damage.
If speed and performance are your priorities, carbon wheels are worth the investment. But if you want something reliable and cost-effective, alloy wheels will serve you well.

Tyres Matter Too!

do you need supplements

We don’t want to forget about tyres. Even the fastest wheels can be held back by poor tyre choices. For one, consider your tyre width. Wider tyres (25-28mm) are becoming increasingly popular for road cycling. They offer lower rolling resistance and better comfort. However, tyre pressure is as important and can make a big difference. Lower pressures can improve grip and comfort, while higher pressures reduce rolling resistance.

Choosing the Right Wheels for Your Riding Style

  • For Climbers: Opt for light, shallow rim wheels to help you tackle hills.
  • For Racers: Mid-depth or deep rim carbon wheels will give you a balance of aerodynamics and weight savings.
  • For Time Trials: Go for deep rims or a combination of a front deep rim and a rear disc wheel.
  • For Everyday Riders: Alloy wheels with mid-depth rims offer durability and versatility.

TEAMMC Cycles: Your Wheel Upgrade Experts

At TEAMMC Cycles, we understand that the right set of wheels can take your cycling to the next level. Whether you’re looking to upgrade to carbon wheels, find the perfect set for your next race, or just want advice on what works best for your riding style, we’re here to help.
We offer a wide range of wheelsets and can help you with fitting, maintenance, and upgrades to keep your bike performing at its best.

Get in touch today and let’s find the wheels that will help you ride faster, further, and with more confidence.

🚴‍♂️ Happy Riding! 🚴‍♀️

Workout Routine for Cyclists: At Home, in the Gym & Outside

Cycling is an incredible sport. But let’s be honest – it’s not all about pedalling. To ride stronger, climb faster, and stay injury-free, off-bike training is essential. A well-rounded workout routine for cyclists strengthens the muscles used in riding, improves endurance, and enhances overall performance. Whether you’re training at home, in the gym, or outdoors, these workouts will help you get the most out of every ride.

Leg Workout for Cyclists

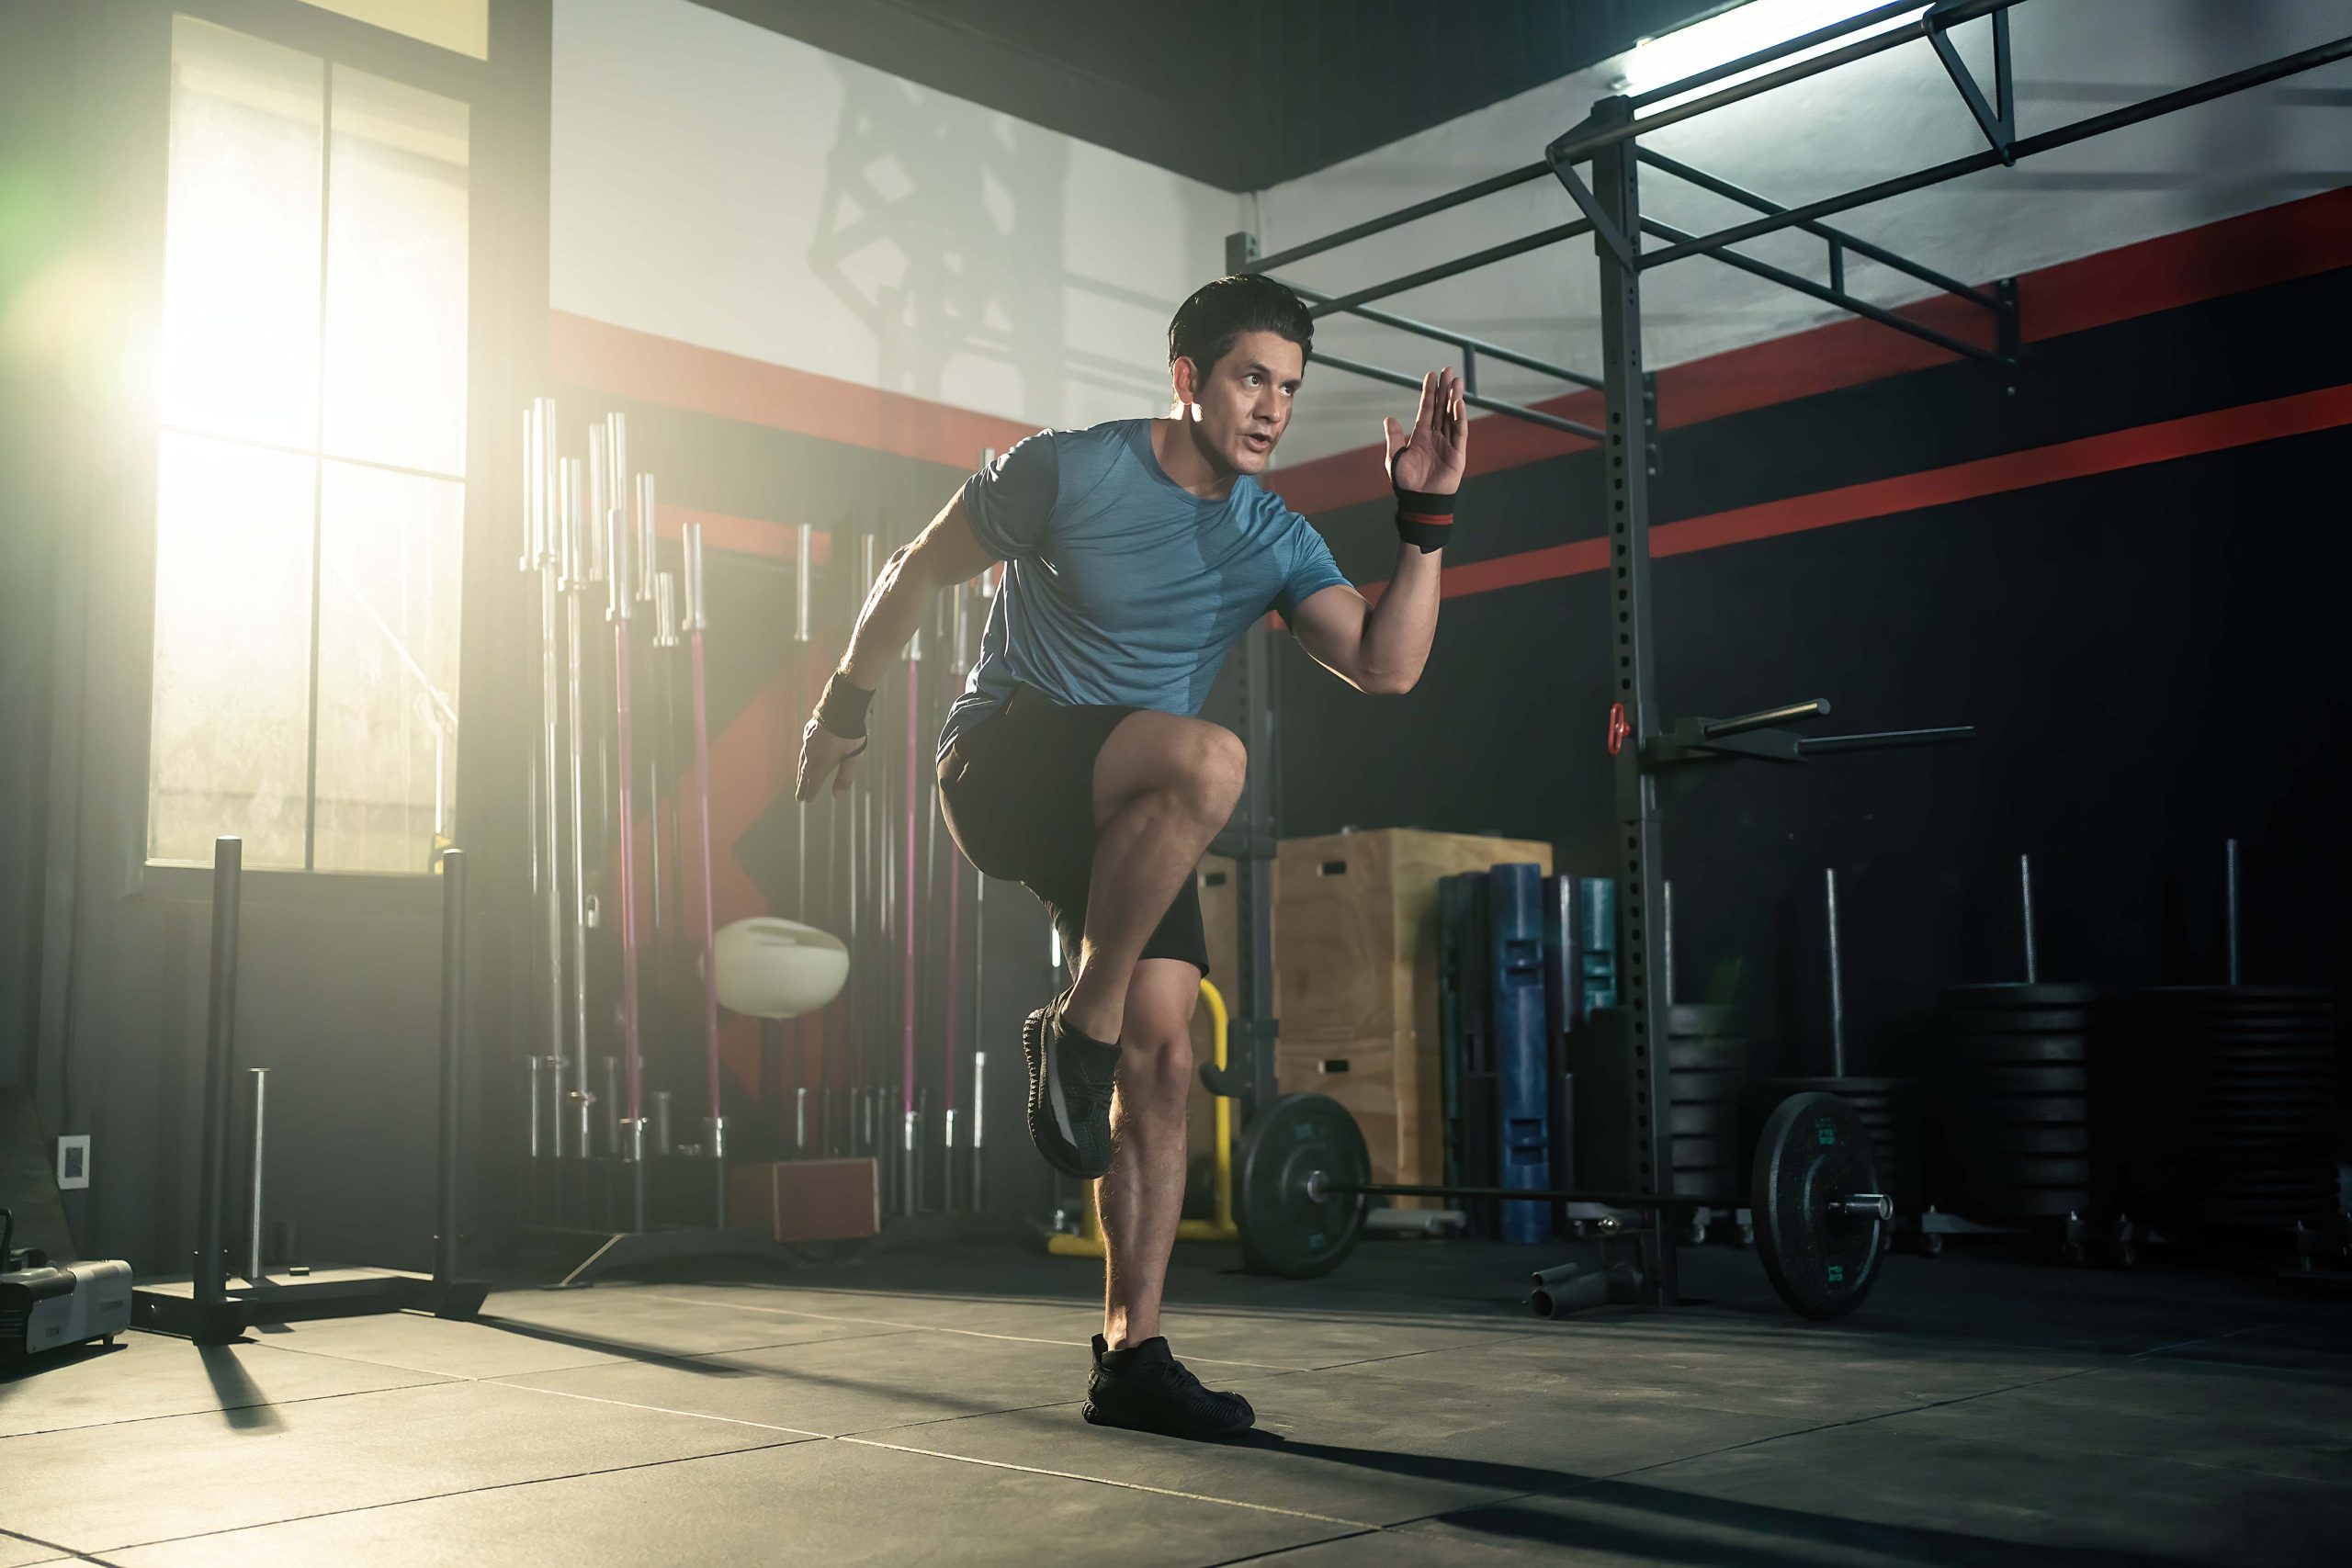
Your legs are your engine. Strong quads, hamstrings, glutes, and calves translate to more powerful pedal strokes, better endurance, and increased resistance to fatigue. Here are five essential exercises to build leg strength:

Workout Routine for Cyclists

  1. Bulgarian Split Squats: Stand facing away from a bench, place one foot behind you, and lower into a lunge. Keep your front knee stable and drive back up. This strengthens each leg independently, improving balance and pedal efficiency.
  2. Back Squats: With a barbell or weights on your shoulders, squat down while keeping your chest up. Squats develop explosive power, essential for sprints and climbs.
  3. Side Lunge: Step to the side, keeping one leg straight and lowering into a lunge. This improves lateral stability and strengthens supporting muscles.
  4. Step-Ups: Step onto a bench, driving through your heel to stand up. Mimics the pedal stroke and builds unilateral strength.
  5. Calf Raises: Stand on a raised surface, lift onto your toes, and lower slowly. Strong calves help with pedal endurance and ankle stability.

Core Workout Routine for Cyclists

Core Workout Routine for Cyclists
Leg workouts are not enough for you? Then let’s move on to your core: A strong core keeps you stable on the bike, reduces fatigue, and improves efficiency. Here are five must-do exercises to include in your workout routine for cyclists:

  1. Plank Variations: Standard, side, and shoulder-tap planks build endurance in your core, preventing lower back pain.
  2. Russian Twists: Sit, lean back slightly, and rotate side to side. This strengthens rotational muscles, aiding bike handling.
  3. Leg Raises: Lying down, lift your legs and lower them slowly. Great for strengthening the lower abs and hip flexors.
  4. Superman Hold: Lie on your stomach, lift your arms and legs, and hold. Strengthens the lower back for better posture.
  5. Bicycle Crunches: Pedal your legs in the air while touching elbow to opposite knee. Enhances core endurance and coordination.

Upper Body Workout for Cyclists

Upper Body Workout for Cyclists

Though cycling is leg-dominant, a strong upper body improves bike handling and stability. Push-ups and shoulder presses enhance upper body strength, posture and control on the bike, while pull-ups and bent-over rows target the back and arms, helping with endurance and power for better hill climbing and handling. Tricep dips help improve arm strength and endurance, reducing fatigue during long rides and enhancing overall pedal stroke efficiency.

  1. Push-Ups: Start in a high plank position with your hands shoulder-width apart, body straight, and core engaged. Lower your chest to the ground by bending your elbows, then push back up to the starting position while keeping your body in a straight line.
  2. Pull-Ups: Grab a bar with an overhand grip, hands shoulder-width apart, and hang with arms fully extended. Pull your chin above the bar by engaging your back and arm muscles, then lower yourself back down with control.
  3. Shoulder Press: Hold a dumbbell or barbell at shoulder height with palms facing forward and elbows bent. Press the weight overhead until your arms are fully extended, then lower it back to the starting position with control.
  4. Bent-Over Rows: Hold a barbell or dumbbells with a shoulder-width grip, hinge at your hips to lean forward while keeping your back straight. Pull the weight toward your lower ribs by engaging your back muscles, then lower it back down with control.
  5. Tricep Dips: Place your hands on parallel bars or the edge of a sturdy bench, keeping your arms straight and shoulders down. Lower your body by bending your elbows until they reach about 90 degrees, then push back up to the starting position using your triceps.

Resistance Band Workout for Cyclists

Resistance Band Workout for Cyclists

Band resistance exercises help you to improve strength, stability, and endurance in key muscle groups used when you cycle. They target the glutes, hips, core, and upper body, enhancing pedal efficiency, posture, and overall power output, while also preventing injury and supporting muscle balance. Try these exercises:

  1. Band Squats: Place a resistance band just above your knees and stand with your feet shoulder-width apart. Push your hips back and bend your knees to lower into a squat, keeping tension on the band, then return to the starting position by driving through your heels.
  2. Lateral Band Walks: Place your band around your legs just above your knees, squat slightly, and take small steps to the side while keeping tension on the band. Maintain a low squat position, step sideways for a set distance, then return in the opposite direction.
  3. Band Deadlifts: Stand on a resistance band with your feet shoulder-width apart, holding the band with both hands in front of your thighs. Hinge at your hips, keeping your back straight and knees slightly bent, then stand up by driving your hips forward, extending your hips and knees while maintaining tension in the band.
  4. Standing Band Rows: Anchor a resistance band at waist height, hold the handles with both hands, and stand with your feet shoulder-width apart. Pull the handles toward your torso, keeping elbows close to your sides and squeezing your shoulder blades together, then slowly return to the starting position.
  5. Glute Bridges with Band: Place your band just above your knees and lie on your back with your knees bent and feet flat on the floor. Push through your heels to lift your hips towards the ceiling, squeezing your glutes at the top while keeping tension on the band, then lower your hips back down with control.

Weight Workout Routine for Cyclists (Including Dumbbells)

dumbbell exercises for cyclists

Still looking for more exercises? (We’re crawling on the floor by now.)
Weight workout routines for cyclists like squats and deadlifts strengthen the glutes, hamstrings, and quads, improving pedal power and endurance. Upper body exercises like shoulder presses and farmer’s carries work the shoulders, arms, and core, helping with stability, posture, and bike handling. Additionally, weight-supported exercises like lunges and step-ups enhance balance and coordination, which are important for maintaining control, especially on varied terrain. Overall, weight workout for cyclists enhances overall strength, reduces fatigue, and helps prevent injuries, all of which contribute to better riding performance.:

  1. Goblet Squats: Hold a dumbbell or kettlebell close to your chest with both hands, keeping your elbows pointed down. Squat down by pushing your hips back and bending your knees, keeping your chest up and back straight, then return to standing
  2. Dumbbell Step-Ups: Hold a dumbbell in each hand and step onto a bench or platform with one foot. Push through your heel to lift your body up, bringing the other foot to meet the first, then step back down and repeat on the other leg.
  3. Romanian Deadlifts: Stand with your feet shoulder-width apart and hold a barbell or dumbbells in front of your thighs. Hinge at your hips, keeping a slight bend in your knees and your back straight, lowering the weight toward the ground, then return to standing by driving your hips forward.
  4. Dumbbell Shoulder Press: Hold a dumbbell in each hand at shoulder height with your palms facing forward. Press the dumbbells overhead until your arms are fully extended, then lower them back down to shoulder height with control.
  5. Farmer’s Carry: Hold a dumbbell or kettlebell in each hand at your sides, keeping your shoulders back and core engaged. Walk forward while maintaining a straight posture, keeping the weights stable and avoiding leaning or swaying.

What’s it all good for?

lunges exercises
By incorporating a workout routine for cyclists into your training, you’ll unlock better performance, reduce the risk of injury, and become a more well-rounded rider.
At TEAMMC Cycles, we believe that off-bike training is key to improving your cycling performance. But there is more to our cycling world, isn’t there? Whether you’re looking for tips on workouts, nutrition, or bike upgrades, we’re happy to chat.
Drop by the shop for a coffee, ask questions, or join us for one of our weekly rides across London or cycling tours across the UK, Europe, and beyond. We’re all about building a supportive cycling community where we help each other get better – on and off the bike. See you on the road!

🚴‍♂️ Happy Cycling! 🚴‍♀️